Poking at the Tesla Model 3 MCU and a closer look at its eMMC #4
softool.cn Notes:
Poke 英 [pəʊk] 美 [poʊk] vt.戳,捅; 推; 拨火; 〈美俚〉打,殴;vi.刺,戳; 刺探,干涉; 伸出; 闲逛;n.
刺,戳; 殴打; 袋子; 懒汉;
As I mentioned in the last post I got some LEDs blinking. Before I present the findings, I should first outline some parts on the MCU board:
softool.cn Notes:
present 英 [ˈpreznt] 美 [ˈprɛznt] adj.现在的; 目前的; 出席的; [语法学]现在时的;n.现在; 礼物;
- Ethernet switch: Marvell 88EA6321. Not sure what’s connected to it. At least the CID and the ethernet port J15 of the MCU board (justification see below).
- CID: Intel Atom E3950 with some RAM chips (4GB?).
- eMMC: MTFC64GJVDN-4M with 64GB in a 169 BGA package connected to Intel SoC.
- gateway: SPC5748GSMMJ6, a smaller chip with a PowerPC e200 core. It bridges the CAN interfaces to the ethernet world.
- FTDI FT4232HQ: Establishes serial interface between Intel SoC and port J21 “FTDI USB DEBUG”
Enter the serial console to the CID
Connecting the FT4232HQ to a computer will yield four serial devices. It looks like only the first device is hooked up with the Intel SoC, the others seem disconnected. Why Tesla hasn’t chosen a cheaper FT232R is beyond my understanding (maybe the other three are connected?!). Anyway, here’s the first stuff I saw:
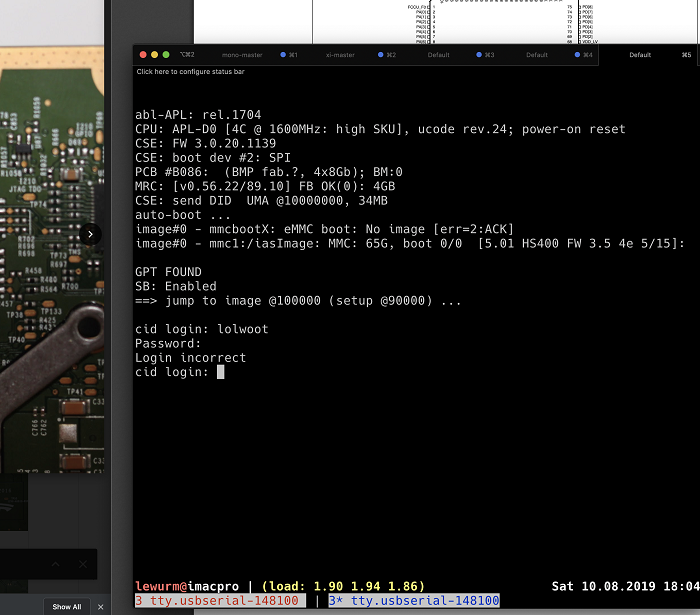
WOOT!
And also: Amazingly I get a Google hit for it: https://pastebin.com/DbPAunKV Unfortunately I don’t know the CID credentials. That would have been too easy, right? ?
softool.cn Notes:
credential 英 [krəˈdenʃl] 美 [krɪˈdɛnʃəl] v.提供证明书;n.凭证;国书;
Wiring up the Ethernet port
I connected the ethernet port to a PC; the last time (see #1) I did that on my actual car, I wasn’t aware of the apparently common network scheme used by Tesla vehicles:
CID:     192.168.90.100
IC:      192.168.90.101   # only Model S/X
Gatway:  192.168.90.102
AP:      192.168.90.103
Since I’m dealing with a Model 3 board, I set the IP of my ethernet adapter to 192.168.90.101. I was a bit surprised, something is happening:
$ sudo nmap -A 192.168.90.100
Starting Nmap 7.70 ( https://nmap.org ) at 2019-08-10 21:11 CEST
Nmap scan report for 192.168.90.100
Host is up (0.00024s latency).
Not shown: 998 filtered ports
PORT     STATE SERVICE VERSION
22/tcp   open  ssh     OpenSSH 7.5 (protocol 2.0)
| ssh-hostkey:
|   2048 e7:b5:43:77:d2:81:11:1f:db:fd:61:66:f4:0e:cf:06 (RSA)
|   256 33:f5:c6:85:a0:bc:bb:18:02:66:52:53:f7:20:aa:dc (ECDSA)
|_  256 ca:2e:2f:9f:6f:e6:a8:ee:bd:e7:66:97:b6:1a:58:9c (ED25519)
8080/tcp open  http    aiohttp 2.1.0 (Python 3.6)
|_http-server-header: Python/3.6 aiohttp/2.1.0
|_http-title: Site doesn't have a title (text/html).
MAC Address: A4:34:D9:01:02:03 (Intel Corporate)
Warning: OSScan results may be unreliable because we could not find at least 1 open and 1 closed port
Device type: general purpose
Running: Linux 3.X|4.X
OS CPE: cpe:/o:linux:linux_kernel:3 cpe:/o:linux:linux_kernel:4
OS details: Linux 3.10 - 4.11, Linux 3.2 - 4.9
Network Distance: 1 hop

TRACEROUTE
HOP RTT     ADDRESS
1   0.24 ms 192.168.90.100
softool.cn Notes:
nmap(Network Mapper)是一款开源免费的针对大型网络的端口扫描工具,nmap可以检测目标主机是否在线、主机端口开放情况、检测主机运行的服务类型及版本信息、检测操作系统与设备类型等信息。
Okay, there is an open SSH open which doesn’t even prompt for a password. That’s a dead end for now. BUT WAIT, WHAT IS HAPPENING ON 8080?!
That is interesting. Unfortunately each item fails and doesn’t do anything interesting. On the developer network tab I see this JSON response:
{"error": "You do not have command permission to perform this task"}Still, that could be an attack vector, although it’s probably hard even when having the server side Python program available. I wonder why Tesla left that port open. Maybe the MCU was put into some kind of reset after the car crash happened?
Anyway, here is the client side source code if anyone is interested: https://gist.github.com/lewurm/63fc5bd4e2591a677b298e2bc277d28a
Circling back to my actual car
With that gathered knowledge I went back. Remember this post #1? I have an ethernet port conveniently exposed on the passenger side. Again, I configured my ethernet adapter to 192.168.90.101/24, and here we go:
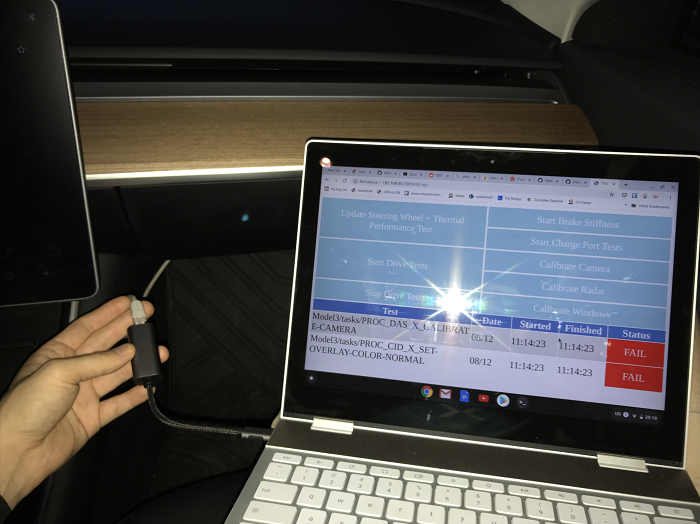
The same test menu is available there too! (Software version 2019.24.4 73fb1ab)
WOAH. So now I really wonder what this is all about.
Obviously I tried clicking something; as you can see something harmless like “Calibrate Camera”. Nothing happened: A look at the developer network tab gave me this:
{error: "Token 2.0 not found."}That is weird. Why is the response different here to what we have seen on the salvaged MCU? The excited part in me want the following to be true: There was an vulnerability that has been fixed in newer software versions. (Meh, but why would they still leave that port open?!).
Here is a port scan (alas only as a picture ? ):
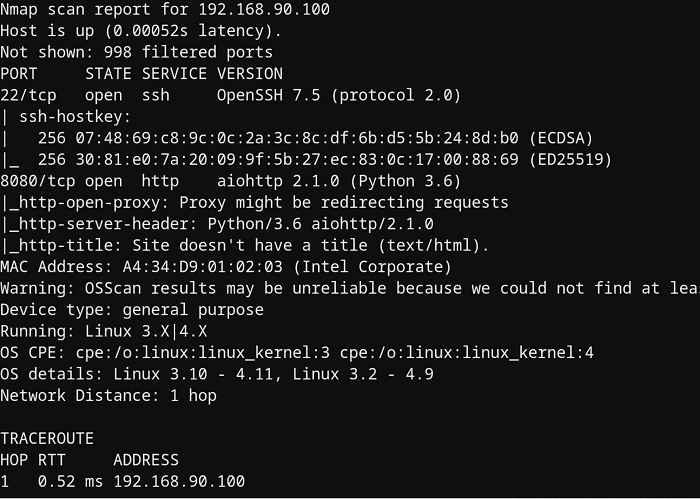
There is a slight difference: The car has one hostkey less. Wut?
No idea, moving on for now.
Poking at the gatway (unsuccessfully)
I remembered reading this instruction at https://github.com/Lunars/tesla/wiki/Gateway-Shell
$ printf "\x12\x01" |socat - udp:gateway:3500

# Once the port is open, Use netcat (or equivalent tool) to
# create a connection to the newly opened telnet port. If
# successful, you will be prompted with ?.

$ nc gateway 23
?

# Use the password 1q3e5t7u for authentication. All gateways
# use the same static password. if successful, you will be
# prompted with gw>.
Unfortunately this didn’t work on the both MCUs. There was however some weird behavior: If I would do this socat command right after the reset of the MCU it would wait for some timeout. After the MCU was up, the socat command was immediately rejected; maybe some rules on the ethernet switch have been set up by this point? Does that make sense?
No idea, but it was worth a try.
Where do I go from here?
Initially I didn’t want to dump the eMMC, but having this login prompt on the serial console only a /etc/shadow-crack away it is really intruding now.
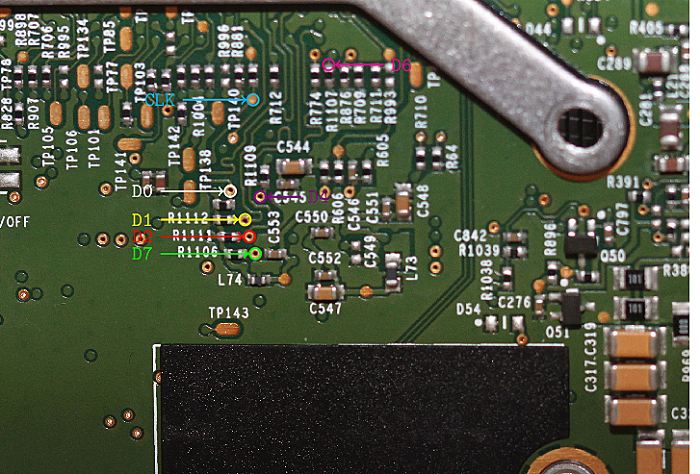
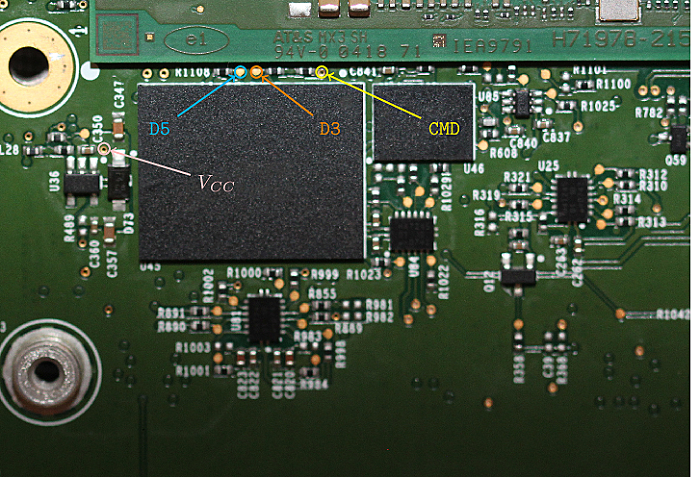
One way to attempt an eMMC dump would be to figure out the pins (see datasheet too):
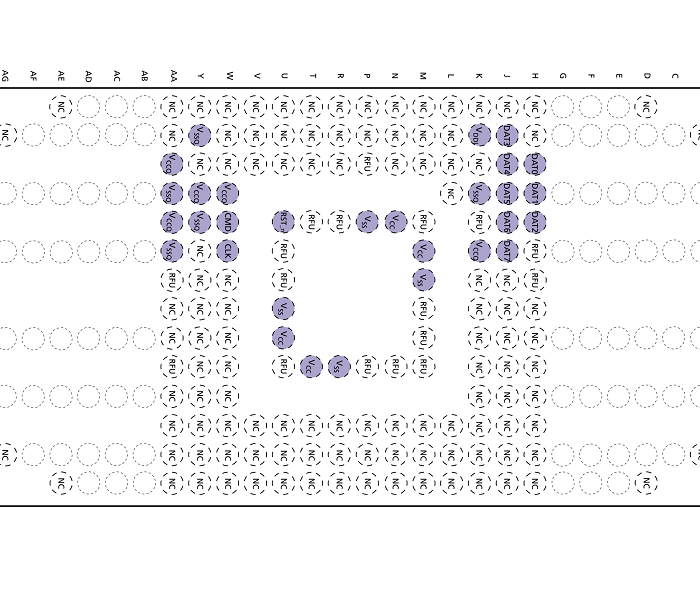
There are eight data pins (D0 would be sufficient. Slower, but who cares for a one-time dump?). CMD, CLK and Vcc. Figuring out those pins is not exactly straight forward, and as I already said, I’m kind of a hardware noob.
At the same time I was following a thread in the German “TFF” forum about replacing the eMMC on the Model S/X MCU. As commonly known Tesla’s software does not treat them nicely and they can wear out after some years leading to corrupted blocks. The problem as of today is that the service center won’t replace just the eMMC but the whole MCU and that’s expensive. Bottom line: People successfully attempted to swap the eMMC on their own.
So it cannot be that hard, right? After googling around I found a shop not far away from my place who are happily dealing with BGA soldering. I gave them a call and they were up for it; cool folks!
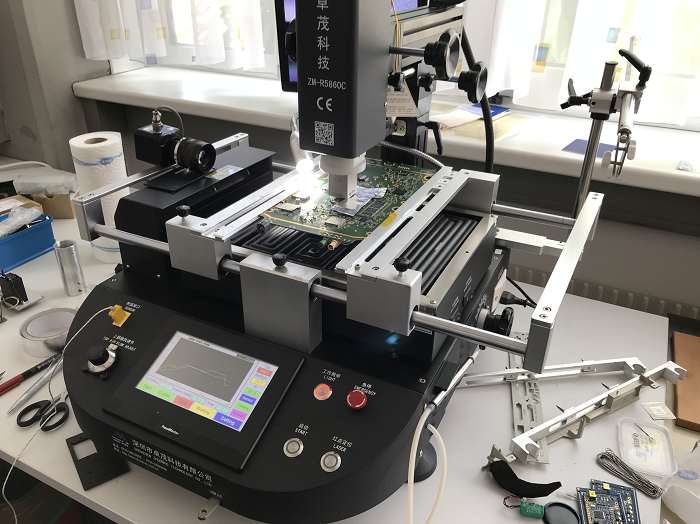
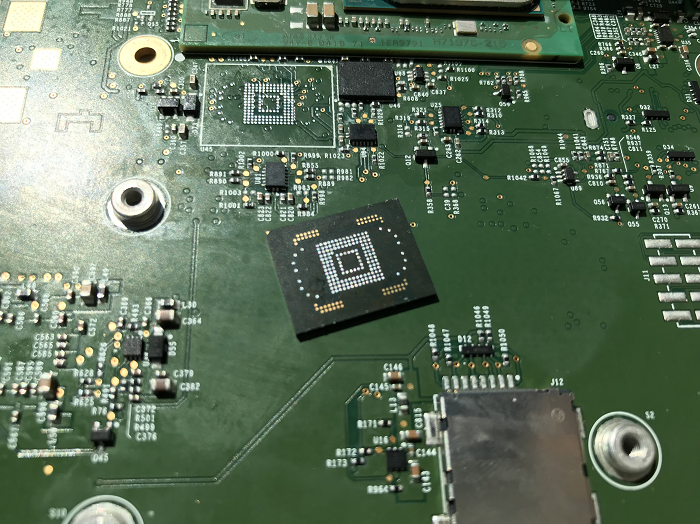
?
My plan now:
- Get a reader, around 80-100 bucks from AliExpress, and DUMP THAT PUPPY.
- Get a replacement eMMC for my salvaged board. I was told that re-balling the BGA package is quite time consuming, so it’s much simpler to use a fresh eMMC chip.
That said, there is still a slight change that the eMMC is encrypted, so better not getting too excited yet (although rumors say it’s not). In the meanwhile I will practice my patience until the eMMC reader arrives from China.
Bonus: Pinmapping for eMMC storage
With the eMMC storage removed I was able to trace the pin layout. Maybe it’s useful for someone out there.
